Introduction
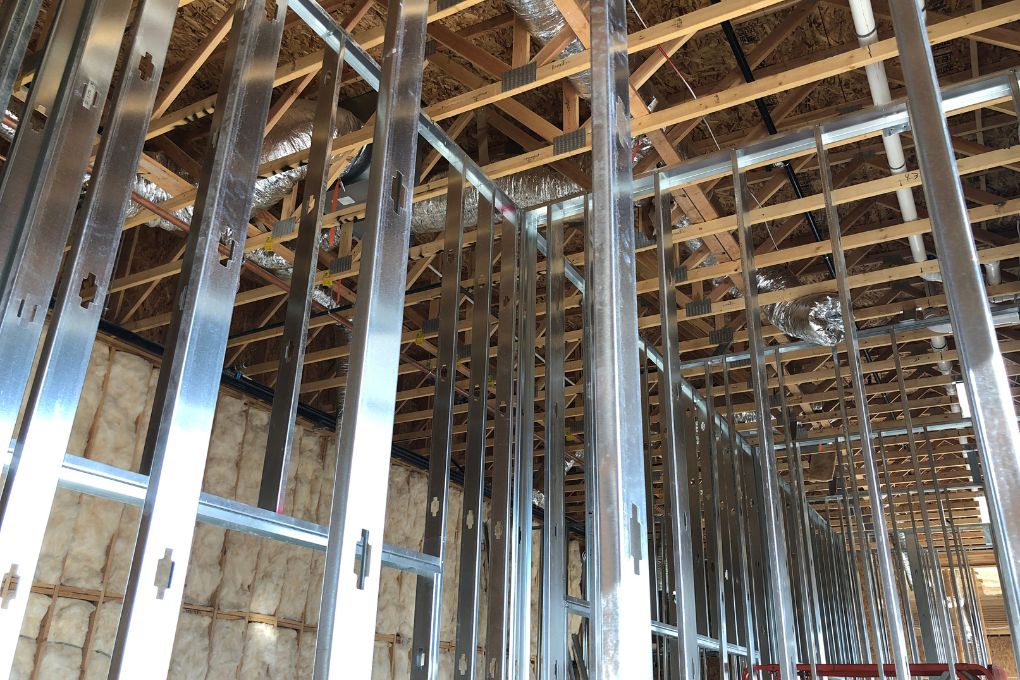
Within the construction industry, metal stud framing has garnered significant popularity due to its inherent durability, versatility, and cost-effectiveness. Irrespective of your level of expertise, whether a seasoned contractor or an avid DIY enthusiast, comprehending the intricacies of metal stud framing is paramount to achieving success in your construction endeavors. Esteemed readers are invited to peruse this meticulously crafted step-by-step guide, which shall serve as an invaluable resource in commencing metal stud framing projects and establishing a robust groundwork for forthcoming ventures.
Tools and Materials
Before diving into the process of metal stud framing, it’s important to gather all the necessary tools and materials. Here’s a comprehensive list of what you’ll need:
Metal studs: These are the primary structural elements used in metal stud framing. They are available in various lengths and gauges, so choose the ones that best suit your project requirements.
Track channels: These are horizontal metal channels that serve as the top and bottom plates of the metal stud wall. Make sure to select the appropriate size and length based on your project specifications.
Screws: Stainless steel screws are commonly used to secure metal studs and track channels. Opt for self-drilling screws for convenience and efficiency.
Drill/driver: A power drill or driver is essential for attaching metal studs and track channels securely. Choose a reliable drill with enough power to drive screws into metal.
Level: To ensure that your metal stud wall is plumb and level, a spirit level is necessary. A 4-foot level or a laser level can provide accurate measurements.
Tape measure: Precise measurements are crucial in metal stud framing. A tape measure with both imperial and metric markings will come in handy.
Aviation snips: These specialized cutting tools are designed for cutting metal studs and track channels. Invest in a high-quality pair for clean and accurate cuts.
Safety equipment: Don’t forget to prioritize safety by wearing protective gear, including safety glasses, gloves, and a dust mask.
Planning and Layout
To commence the actual process of constructing frames, meticulous preparation and arrangement are of utmost importance. Here, we present the essential steps to be followed:
Establish wall placements: Determine the precise areas where the construction of metal stud walls is desired. Consider architectural drawings, adhere to building codes, and fulfill project requirements.
Mark positions of studs and tracks: Utilize a tape measure and a pencil to mark the precise locations of metal studs and track channels on both the floor and ceiling. Ensure accuracy in spacing and alignment.
Identify electrical and plumbing elements: Prior to framing, locate the positions of electrical wires, outlets, switches, and plumbing lines. Make appropriate adjustments in the layout to accommodate them.
Devise a framing strategy: Formulate a comprehensive framing plan that delineates the necessary quantity of metal studs, track channels, and other framing components for each individual wall.
Framing Process
With the planning and layout completed, you’re ready to start the metal stud framing process. Follow these steps:
Install track channels: Begin by attaching the top and bottom track channels to the floor and ceiling using screws and a drill/driver. Ensure they are level and secure.
Cut and install metal studs: Measure and cut metal studs according to the wall height. Secure them vertically between the top and bottom track channels using screws and a level for alignment.
Connect metal studs: To create longer walls, overlap metal studs at their ends and connect them with screws. Ensure a snug fit and proper alignment.
Frame openings: For doors and windows, create rough openings by removing the necessary studs and track channels. Install additional framing elements, such as headers and cripple studs, as required.
Secure metal studs: Once all the metal studs are in place, secure them to the track channels using screws. Check for plumb and level alignment at regular intervals.
Finishing Touches
After completing the framing process, it’s time to add the finishing touches to your metal stud wall. Here’s what you need to do:
Insulation: Install insulation material within the wall cavities to enhance thermal and acoustic performance. Choose insulation suitable for your climate and building requirements.
Sheathing: Apply sheathing material, such as gypsum boards or cement boards, to the metal stud wall. Secure them with screws or adhesives, following the manufacturer’s guidelines.
Finishing: Finish the wall surface with paint, wallpaper, or any other desired finish. Ensure proper preparation, such as sanding and priming, before applying the final finish.
Conclusion
Metal stud framing is a versatile and cost-effective solution for constructing interior walls. By following this step-by-step guide, you now have the knowledge and understanding to get started with metal stud framing. Remember to gather the necessary tools and materials, plan and layout your walls meticulously, and follow the framing process accurately. With practice and experience, you’ll be able to master this technique and create durable and functional metal stud walls for your construction projects.
FAQs
Q1: Can I use metal studs for exterior walls?
A1: Metal studs are primarily designed for interior applications. For exterior walls, it’s recommended to use specialized materials and framing techniques suitable for the weather conditions in your area.
Q2: Are metal stud walls load-bearing?
A2: Metal stud walls can be load-bearing or non-load-bearing, depending on their design and construction. Consult a structural engineer or building professional to determine the load-bearing capacity of your metal stud walls.
Q3: Can I install electrical wiring in metal stud walls?
A3: Yes, electrical wiring can be installed in metal stud walls. However, it requires appropriate techniques and electrical boxes designed for metal stud framing. Consult a licensed electrician to ensure compliance with electrical codes and safety standards.
Remember to always prioritize safety, consult local building codes and regulations, and seek professional advice when necessary to ensure successful metal stud framing projects. Happy building!


